Homepage

Mostrando las entradas con la etiqueta display. Mostrar todas las entradas

sábado, 14 de mayo de 2016

Arduino Mega 2560 Oled Display I2C Master Modbus RTU Scada Industrial Connection


This evidence although simulate other tests carried out in previous Post implemented Arduino and protocol Modbus RTU serial master mode, is the first step for connecting arduino an environment Scada Industrial we will see more before implementing Modbus TCP IP, if you want to see continue in PDAControl final application.

Other Implementations Arduino and Modbus RTU:

Modbus RTU Master Library tests with Arduino 
Modbus RTU Master tests with Arduino via RS232 and screen Panasonic GT01
Modbus RTU Master tests with Arduino via RS232 and PLC Panasonic FPX C14R

Explanation of Application
In this test we will read a potentiometer 100k connected to the input analog 0, the value of ADC0 0-1023 be transmitted via Modbus RTU Simulator Master Modbus in Holding Register [11] and this transmitted value is displayed on the display oled Connected to the Arduino via I2C.


Materials
1- Arduino MEGA 2560 R3
2- Display Oled 128 x 64 
3- Poteciometer 100K
Mounting


ADC0 visualization on display Oled


Video of tests

Arduino MEGA 2560 Master Modbus Potenciometer Display  Oled I2C


Connections


sábado, 30 de abril de 2016

ESP8266 + Display Oled I2c Client IRC Chat Control


Explanation
1. ESP8266 the feed module automatically performs the IRC connection to an IRC server, the room defined using a Nickname ESP8266IRC.
2. using in this case an IRC client android I connect to the same server and the same room with another nickname and module prints the characters received in the Oled Display.
- All Android caractares sent from the client will be displayed on the OLED display.

Remote control
I believe that if you want to create an application Remote Control via Ethernet can be done very easily since the bridge connection are the IRC rooms which are always active and would be a atravez control characters, in this case from the android client could activate GPIO module'S ESP8266.

IRC Chat Architecture


Materials:
ESP8266 - 01.
Oled Display 128 x 64 protocol I2C.
Acid Battery 6V.
Voltage regulator LD1117.

Connections


Realized tests


Tests


In this case it has been used to power the system a 6V battery, for this case to note that the ESP8266 module should aliemntar to 3.3v to use a voltage regulator.

+


Downloads:


martes, 29 de marzo de 2016

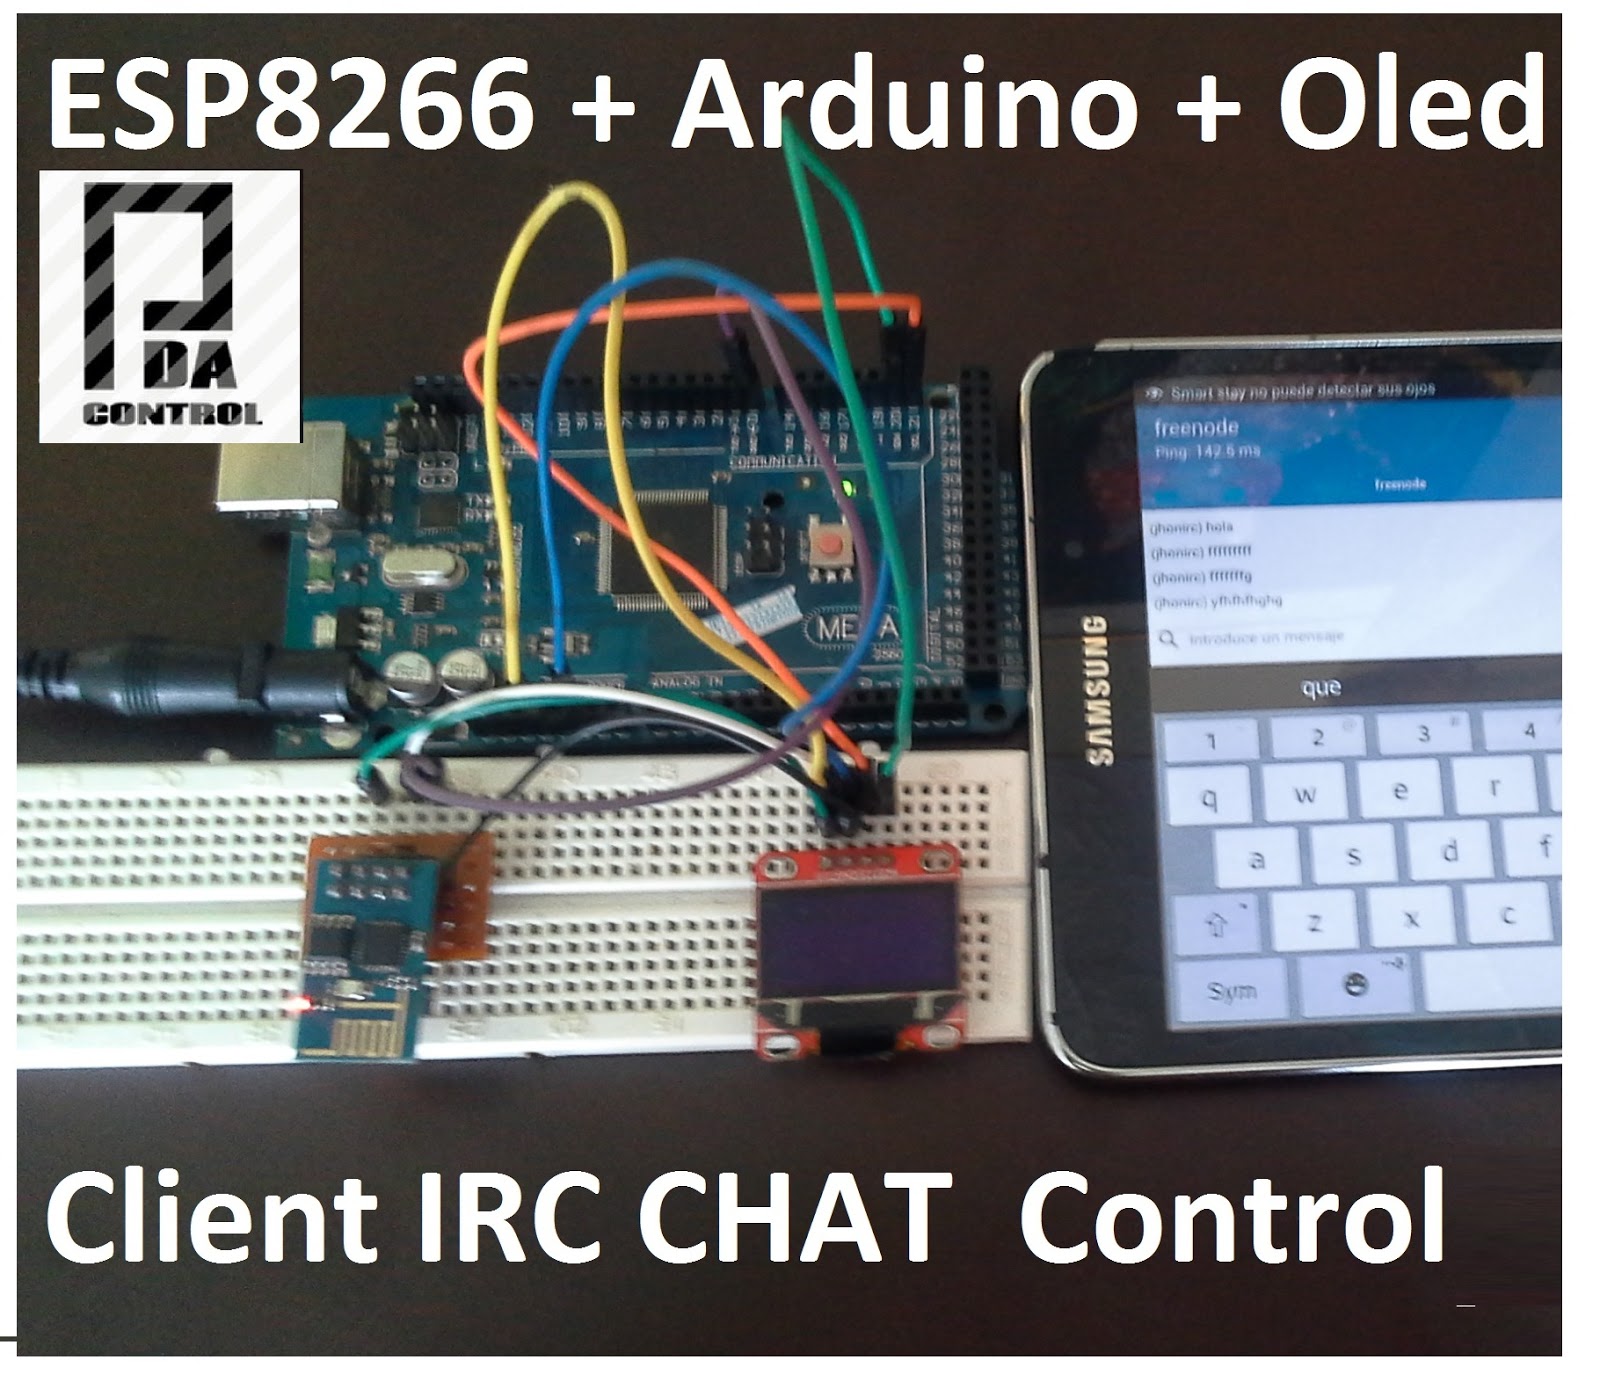
ESP8266 + Arduino + Oled ( Client IRC Chat Control) Part 1


I have seen many examples of how to control the Arduino remotely but require excessive settings and when using either ethernet LAN or WLAN communication in most examples only works on a local network or intranet.
It tryied a simple way to control using the IRC Chat forgotten and implement it in the ESP8266 module.

The IRC is simple communication since communication is performed between clients, the server is on the network and data values or specific characters sent automatically handles routing.


Explanation of application
1. In this test the ESP8266 module performs the IRC connection to an IRC server, the room defined using a Nickname.
2. using in this case an IRC client android I connect to the same server and the same room with another nickname and retransmits the module received by the serial port.
3. The Arduino Mega 2560 Just print characters received in the Oled display and performs the activation of inputs and outputs

Materials 
Arduino Mega 2560
Display Oled 128 x 64 I2c
ESP8266 - 01

To make this project requires read before the following:

Arduino y Oled 128 x 64  Terminal serial

Esp8266 como cliente IRC  

Important note:
In this case it is only control from any client IRC is the only ESP8266 receives, in this test is not yet implemented the ESP8266 send messages, although perform the test and working properly.

Real-Time Testing


Downloads Arduino code GitHub:


More info:
more Test 

ESP8266 IRC Client Chat - Control via Internet Part 1


Arduino Terminal Serial + Oled 128x64 I2c