This time a test is carried out with the Thinger.io platform, using a 01 ESP8266 be conducted remotely control a diode led directly from the web platform.
As shown by a LED diode will control but the application can be with relay actuators and others.
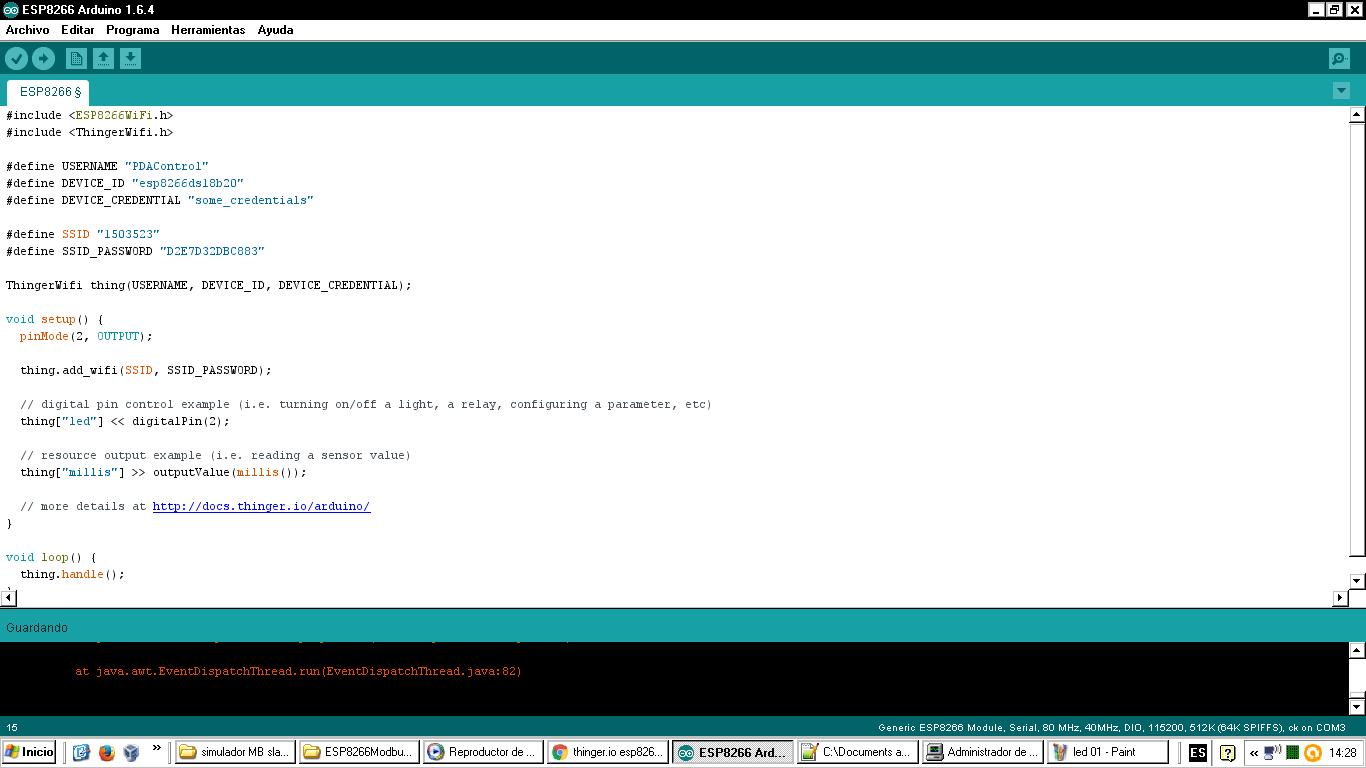
This time I bring this IoT platform called Thinger.io, in this tutorial as NOTED create an account to register our devices either Arduino, Raspberry Pi or other data collection platform in my case tests effected, with the ESP8266 01.
This platform allows monitoring and control of variables without any complications.
page Oficcial : https://thinger.io/
You want to try thinger.io? The following video will show you step by step
It is a project in development based on open source developed by Trystan Lea, this application has tools for measuring energy or electricity consumption, mixing hardware and software which is available to anyone who wants to start measuring and regulation of energy consumption the purpose of this project is sustainable development.
Arquitecture Openenergy Monitor
You have the ability to create your own hardware and adapt or contribute to the development of software compatible with Arduino and Raspberry Pi,
Implements the measurement and monitoring of variables atravez hardware nodes implementing opensource
It has a management income users with login and password
sending data is encoded with a unique key to avoid collisions Notifies the updating of variables, graphs indivisuales, comparative It has a great tool dashboards equivalent to a scada interface
All our hardware units are fully open-source and based on Arduino. Firmware sketches are available open-source on GitHub. See Resources for info on how to setup Arduino IDE.
Step by Step Installation Emoncms in Windows 7
Install Emoncms on Windows Part 1
Install Emoncms on Windows Part 2
Emoncms more tests on other platforms..............